Monitor your device
Requires the Mender Monitor add-on package. See the Mender plans page for an overview of all Mender plans and features.
This tutorial is not supported by the virtual device because it does not come with a package manager to install the needed dependencies.
This tutorial will walk you through how to monitor your device and its applications with Mender. We will be using the Monitor Add-on, allowing you to monitor various system parts.
Prerequisites
To follow this tutorial and perform the examples, you will need to install the Monitor Add-on package and the Demo monitors package on your device. If you have followed the get started tutorial to prepare your device, the Monitor Add-on, and Demo packages should already be installed.
Verify installed dependencies on your device with:
sudo mender-update --version && sudo mender-monitorctl --versionThe output should give no errors and print the version of both tools.
Check installed monitoring subsystems with:
ls -lAh /etc/mender-monitor/monitor.d | grep -v '^d'
-rwxr-xr-x 1 root root 2669 Aug 17 20:09 connectivity.sh
-rwxr-xr-x 1 root root 2298 Mar 10 09:37 dbus.sh
-rwxr-xr-x 1 root root 2498 Aug 18 01:14 diskusage.sh
-rwxr-xr-x 1 root root 3738 Mar 10 09:37 log.sh
-rwxr-xr-x 1 root root 3016 Mar 10 09:37 service.sh
Verify existence of check definitions with:
ls -lAh /etc/mender-monitor/monitor.d/available/ | grep -v '^d'
-rwxr-xr-x 1 root root 176 Aug 17 20:09 connectivity_example.sh
-rwxr-xr-x 1 root root 173 Aug 18 01:14 diskusage_root_space.sh
-rwxr-xr-x 1 root root 201 Aug 17 20:09 log_mender_client.sh
-rwxr-xr-x 1 root root 203 Aug 17 20:09 log_mender_connect.sh
-rwxr-xr-x 1 root root 297 Aug 17 20:09 log_usb_disconnect.sh
Demo Checks
Demo Checks for the Mender Monitor Add-on, found in the Demo monitors package (Debian package) or in the examples directory for Yocto serve as a starting point for quick evaluation.
Once ready, you can customize and define your own Checks.
By default both mail notifications and UI alerts occur once a monitored event happens. While going through the examples in this tutorial, watch the email inbox of your Mender user to see that you get notified about Alerts triggered and cleared on the device.
The default configuration for mender-monitorctl command requires read-write access to the /etc/mender-monitor directory, which on most systems means switching to super user or running with sudo.
For a read-only filesystem, it is essential to establish a symbolic link to a writable directory. This symlink is required to create, modify, and enable alert checks.
Some demos use journalctl as a source of logs. For that reason mender-monitor needs to be restarted after enabling certain demos
Monitor USB disconnects
This demo shows detecting USB disconnects, alerting you to potential device tampering and preventing unauthorized access
Enable the check by running:
sudo mender-monitorctl enable log usb_disconnect
sudo systemctl restart mender-monitor
Now remove a USB device from the device (you can insert it first, e.g., a thumb drive or mouse, if you don't have any USB devices inserted). Once you remove the USB device, the log subsystem triggers an alert, which you can inspect in the device details in the Mender UI:
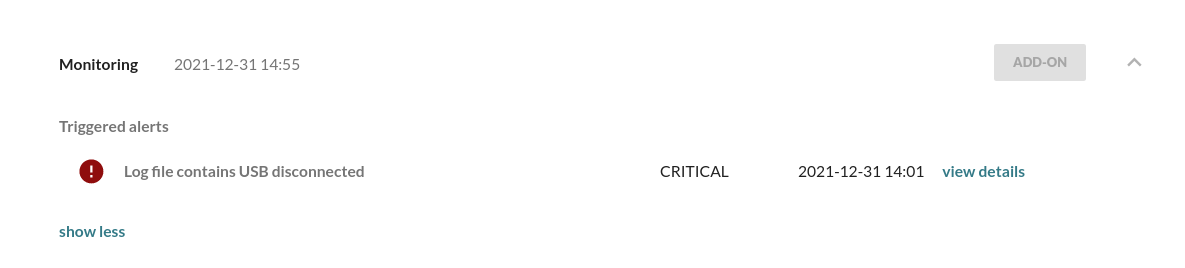
Note: This Alert will remain unless a manual alert cleaning is performed:
sudo su
cd /usr/share/mender-monitor
source lib/monitor-lib.sh
monitor_send_alert OK "Log file contains \[.*\] +usb [\w\-\.]+: USB disconnect" "\[.*\] +usb [\w\-\.]+: USB disconnect present in /var/log/kern.log" "log_usb_disconnect" LOGCONTAINS "log" "\[.*\] +usb [\w\-\.]+: USB disconnect" "/var/log/kern.log"
Monitor disk usage
Running low on essential device resources like disk space, often due to growing log files, can disrupt the product's functionality. This example shows you how to monitor for high disk usage, allowing timely action to avoid downtime.
Enable the diskusage check for the root space partition called root_space by running the following command:
sudo mender-monitorctl enable diskusage root_spaceCheck the current disk usage.
df -h /

# Output:
# Filesystem      Size  Used Avail Use% Mounted on
# /dev/root       3.4G  1.4G  1.9G  42% /
With the check enabled an alert will be triggered when the root partition exceeds 75% (predefined threshold). To trigger the Alert, fill up the filesystem with a large file:
fallocate -l 10G ~/large-fileas the disk usage goes above the 75% threshold
df -h /

# Output:
# Filesystem      Size  Used Avail Use% Mounted on
# /dev/root       3.4G  3.4G     0 100% /
an alert shows up in the UI.

An OK alert will be sent by the diskusage monitoring subsystem if this
file is removed, and the disk space is less than the threshold.
rm ~/large-fileMonitor connectivity
Ongoing connectivity issues may cause the device application to hang or malfunction, disrupting the user experience or function of the product. This Alert is one example of how to detect connectivity issues.
Mender stores triggered Checks on the device. Therefore, even if Mender cannot send the Checks to the server immediately, you will be notified about triggered Checks once the device regains connectivity. This means that even during offline periods, Alterts are triggered.
Enable the connectivity check called example:
sudo mender-monitorctl enable connectivity exampleThis enabled a Check using the demo connectivity monitoring subsystem, which sends HTTP HEAD
requests to example.com, ensuring it is responding.
To trigger the Alert, let us stop the traffic to example.com by
redirecting the DNS resolver to localhost in /etc/hosts.
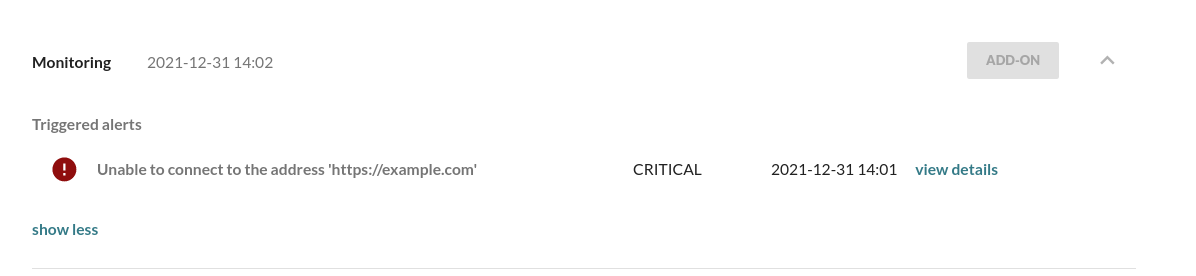
echo 127.0.0.1 example.com | sudo tee -a /etc/hostsWhich then triggers the Alert:
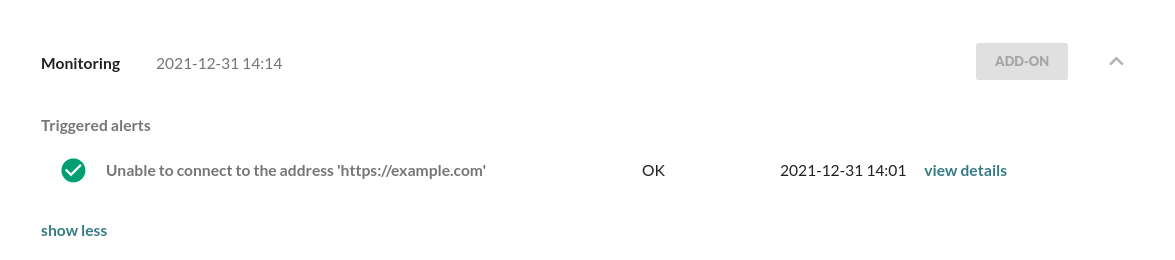
And when re-enabling the route to example.com in /etc/hosts:
sudo sed -i '/example/d' /etc/hostsAfter connection to example.com is restored, an OK Alert will show up in the UI:
Monitor a systemd service
Assume you want to monitor the state of a systemd service, and you wish to receive CRITICAL alerts if the service is not running, and OK alerts when it is back up.
Create a service that will count some seconds and then fail. You will have to run this script as root:
cat > countdown.sh << "EOF"
#!/bin/sh
i=30
while [ $i -gt 0 ]; do
    echo "INFO: $i seconds remaining"
    i=$((i-1))
    sleep 1
done
echo "ERROR: Exiting with return 1"
exit 1
EOF

PATH_TO_SCRIPT=$(realpath countdown.sh)
chmod +x $PATH_TO_SCRIPT

cat > /etc/systemd/system/countdown.service << EOF
[Unit]
Description=Countdown Service

[Service]
Type=simple
ExecStart=$PATH_TO_SCRIPT

[Install]
WantedBy=default.target
EOF

systemctl daemon-reload
systemctl start countdown.service
You can for example put the above code in a file with the name setup-countdown.sh and run it with sudo:
sudo bash setup-countdown.shYou can confirm the countdown with journalctl -fu countdown.service.
Now create and enable the check for the systemd service monitoring subsystem:
sudo mender-monitorctl create service countdown systemd
sudo mender-monitorctl enable service countdown
Once the service exits, an alert is sent.
Restarting the service will send an ok Alert.
sudo systemctl restart countdownTo stop the monitoring, disable and delete the check
sudo mender-monitorctl disable service countdown
sudo mender-monitorctl delete service countdown systemd
If you want to examine the low-level architecture of mender-monitor using this example follow this link.
Monitor new root sessions
The root account has complete control over the server, making it a target for unauthorized access. Monitoring these sessions helps in the early detection of security breaches, ensuring that any unauthorized access is quickly identified and addressed.
First, create a check for the log monitoring subsystem named auth_root_session by running
the following command:
sudo mender-monitorctl create log auth_root_session "Started User Manager for UID 0" "@journalctl --follow"
sudo mender-monitorctl enable log auth_root_session
sudo systemctl restart mender-monitor
Not that the check is in place, change your user to root:
sudo suthis will trigger an alert notifying you of the event that took place.