Deploy an Application update
To deploy an application update you should follow the UI tooltips presented on hosted Mender.
This tutorial is here as a reference if you need additional guidance or would like to get an overview of the steps necessary to deploy an application update.
Prerequisites
You should have completed one of the following:
Step 1 - Create a Deployment
In the Device information view for the device you just connected, select Create a deployment for this device from the Device actions.
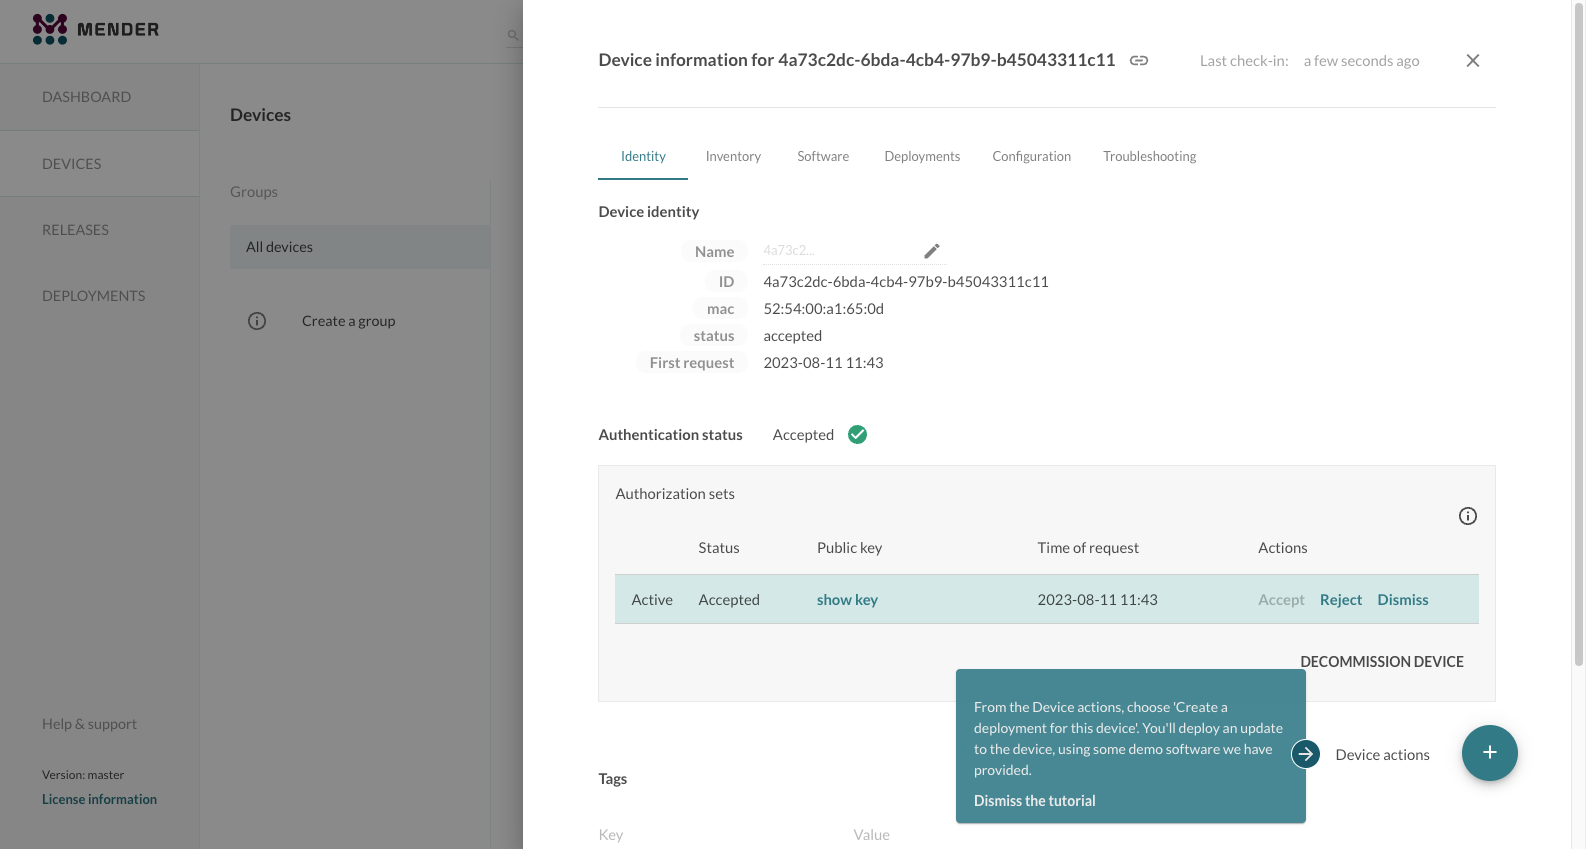
This will start the deployment wizard. As we have only one device connected the Select a device group to target should be automatically filled in with the device ID. In this case the first step is to Select a Release to deploy.
There is already a demo Artifact available the first time you use hosted Mender, for the purposes of this tutorial. It contains a small web server you will run on your device. If you want to build it yourself the sources and instructions are available at repository.
Select the Release with the name beginning mender-demo-artifact; this will be deployed to your device.
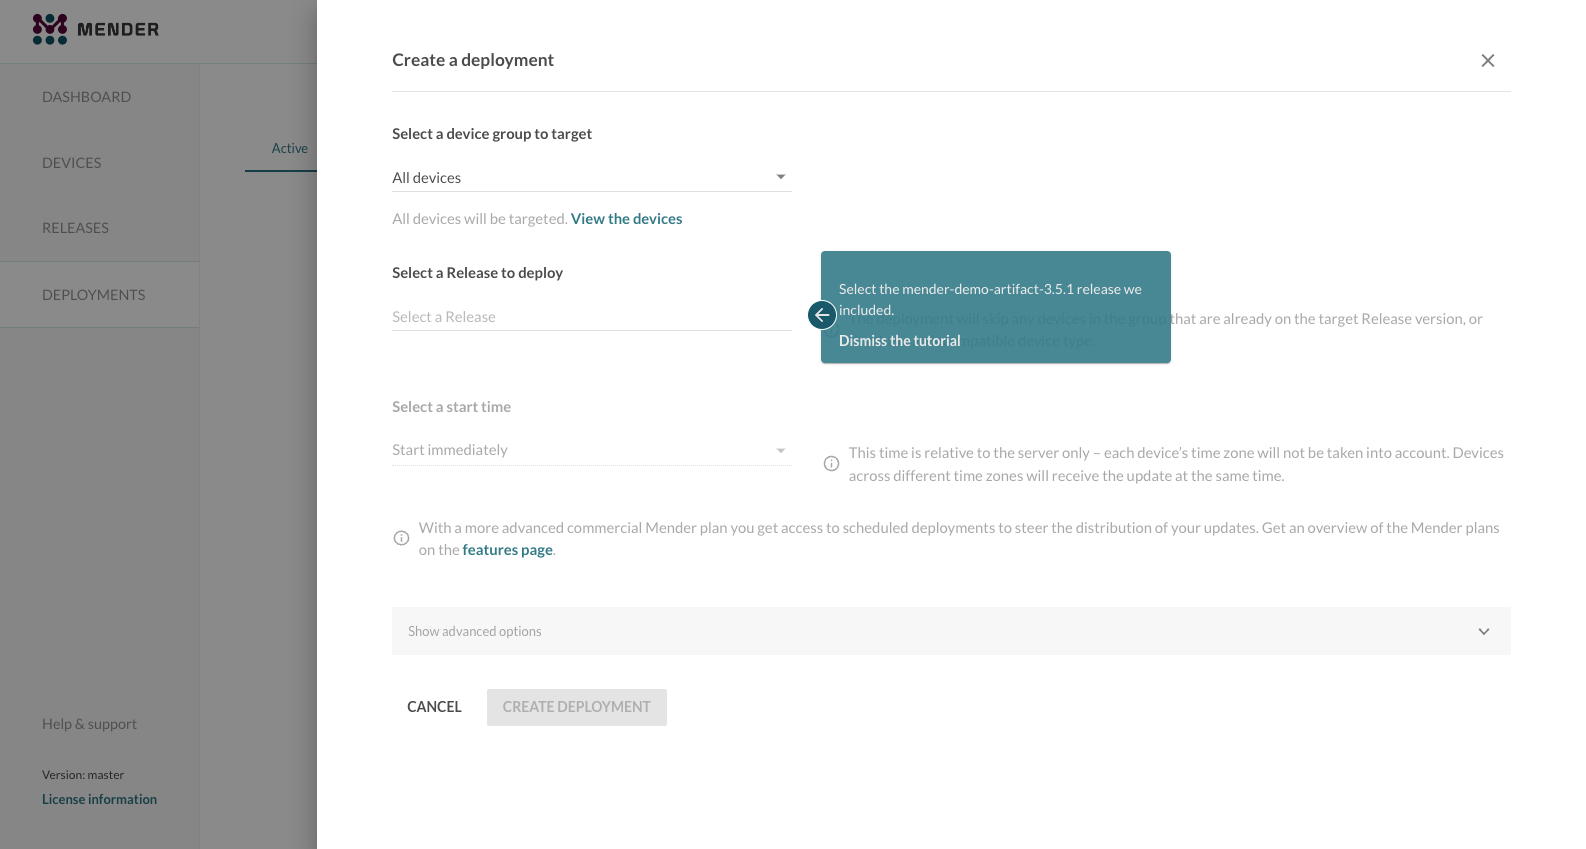
Review your deployment configuration and click CREATE DEPLOYMENT. This will take you to the overview of the deployments and you should see it pending or in progress once your device begins the update.
After a short time you will see the finished deployment in the
Finished tab. You can now visit the deployed web server in your device
by going to http://<your_device_ip>:85 in your browser.
To get your device's IP: for a Raspberry Pi connected by following
Prepare a Raspberry Pi device,
you can run $ hostname -I inside your RaspberryPi terminal.
For a virtual device, connected by following Prepare a virtual device,
you can user the $IP_ADDRESS variable defined in Get the IP address of the virtual device.
If you visit the presented URL, you will see a welcome page similar to the following. Your device has been updated and is now running the demo software.
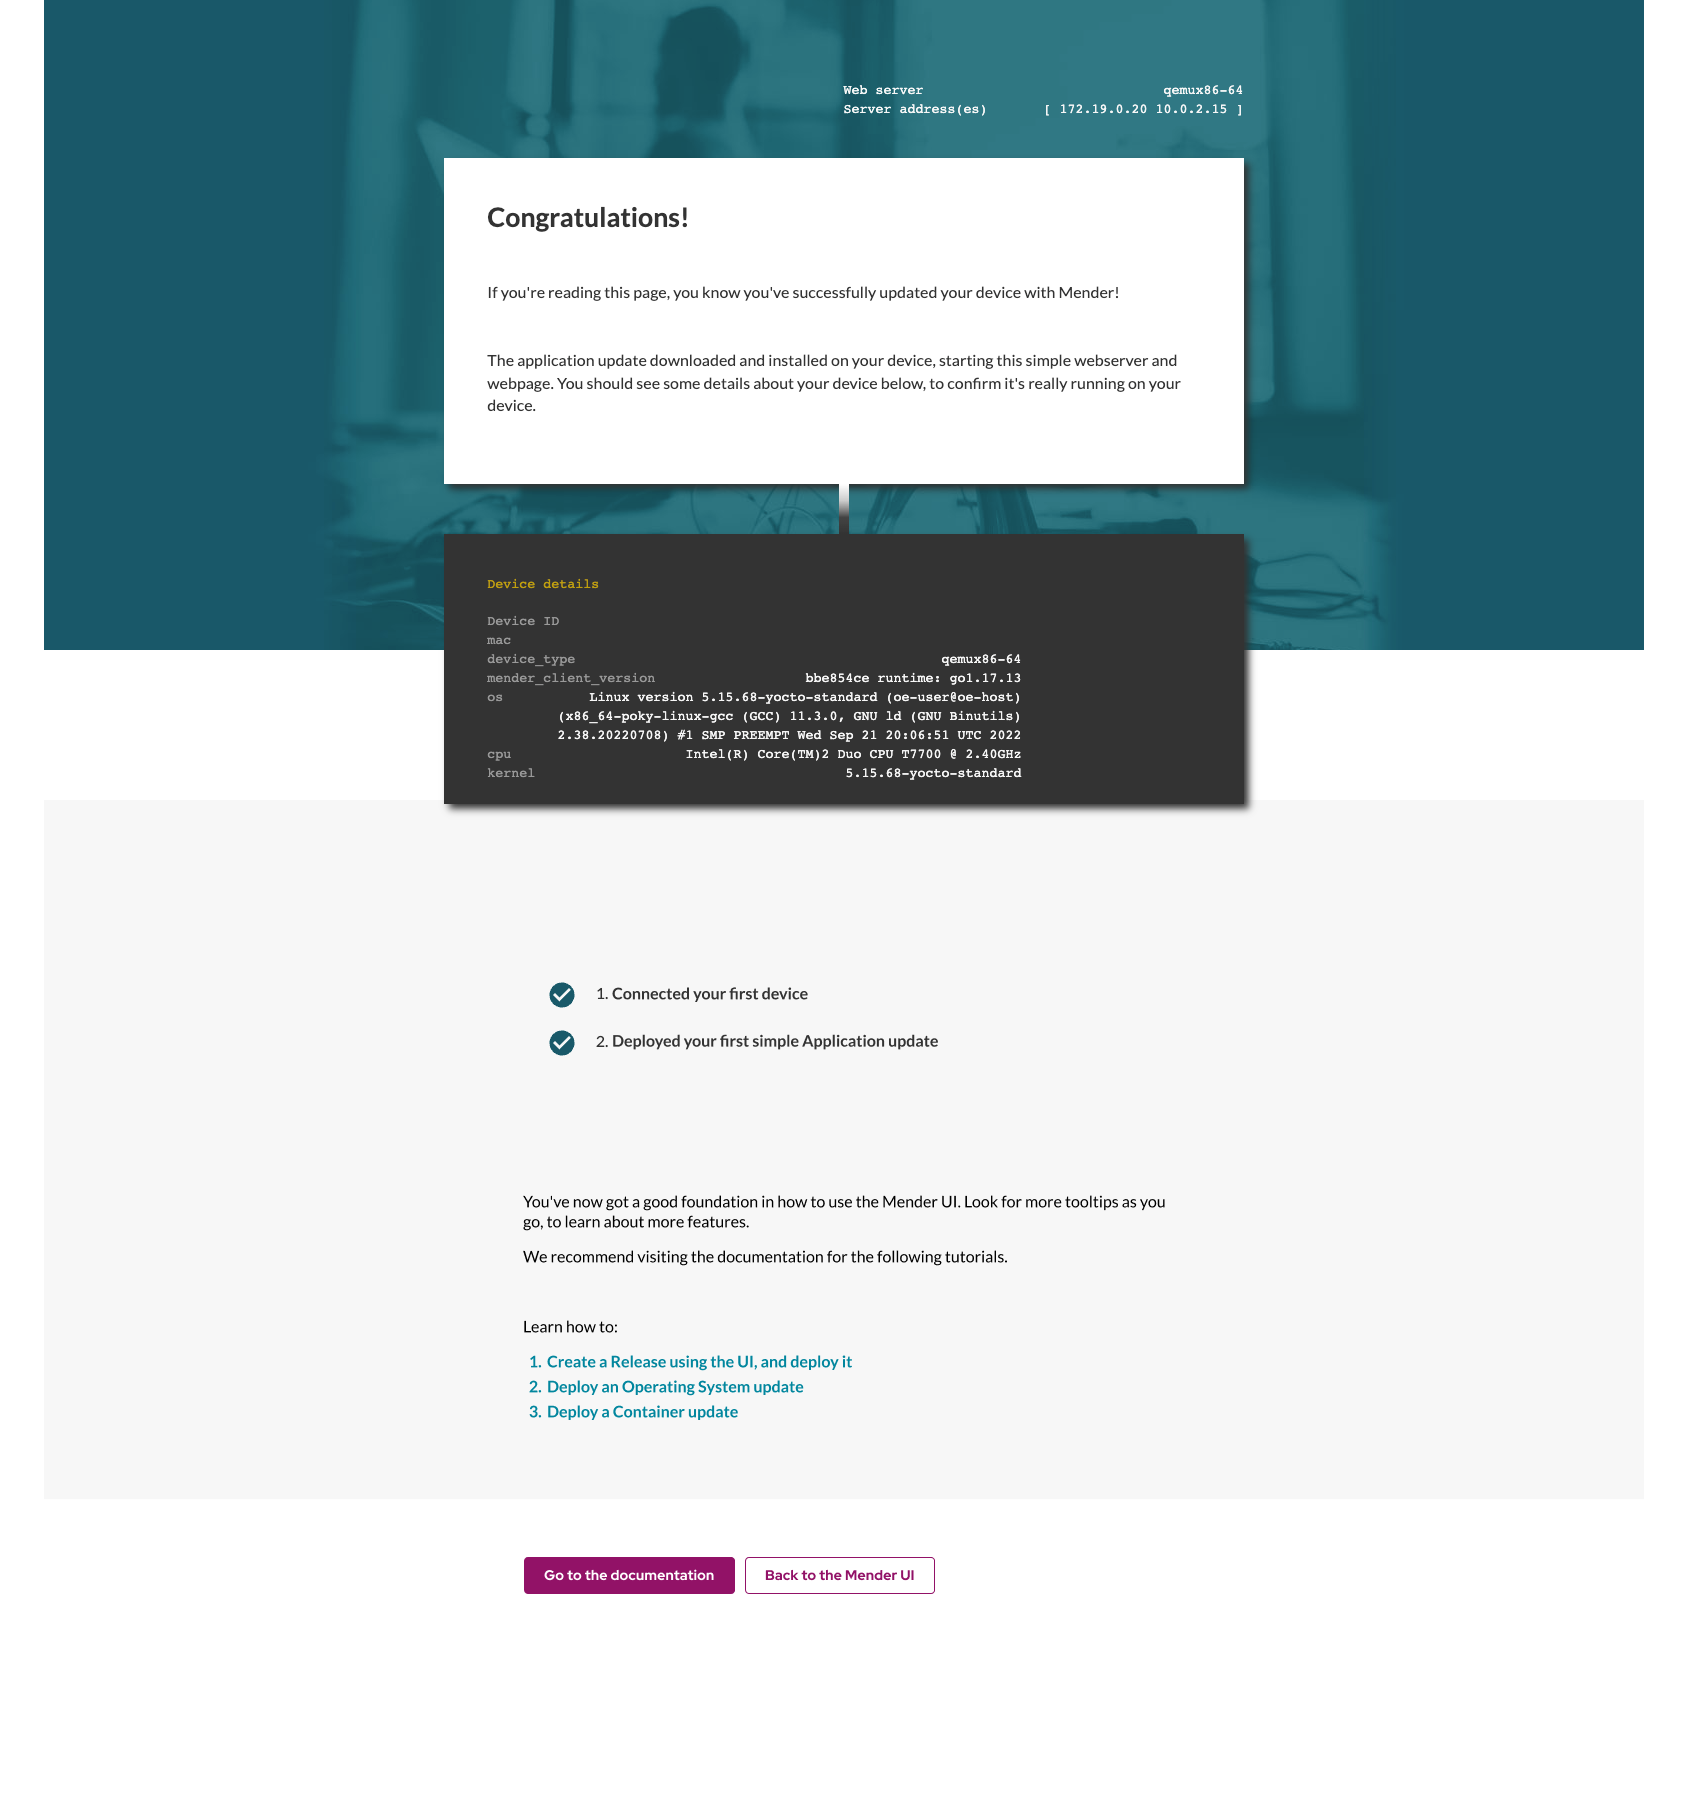
Congratulations! You have successfully deployed an application update using Mender!
Step 2 - Modify the application and deploy it
Now we'll make an update to the webserver demo running on your device, using a new Release that you will create yourself.
Leave the demo web page from the previous step open, you'll use it to verify the update at the end of this step.
On your workstation, create a new index.html file with the simple contents 'Hello World'. This will be the new web page after you update the application, so you'll be able to easily see when your device has received the update. Copy and run the following command to create the file:
cat >index.html <<EOF
Hello World!
EOF
Click on RELEASES from the left panel. Then click the UPLOAD button.
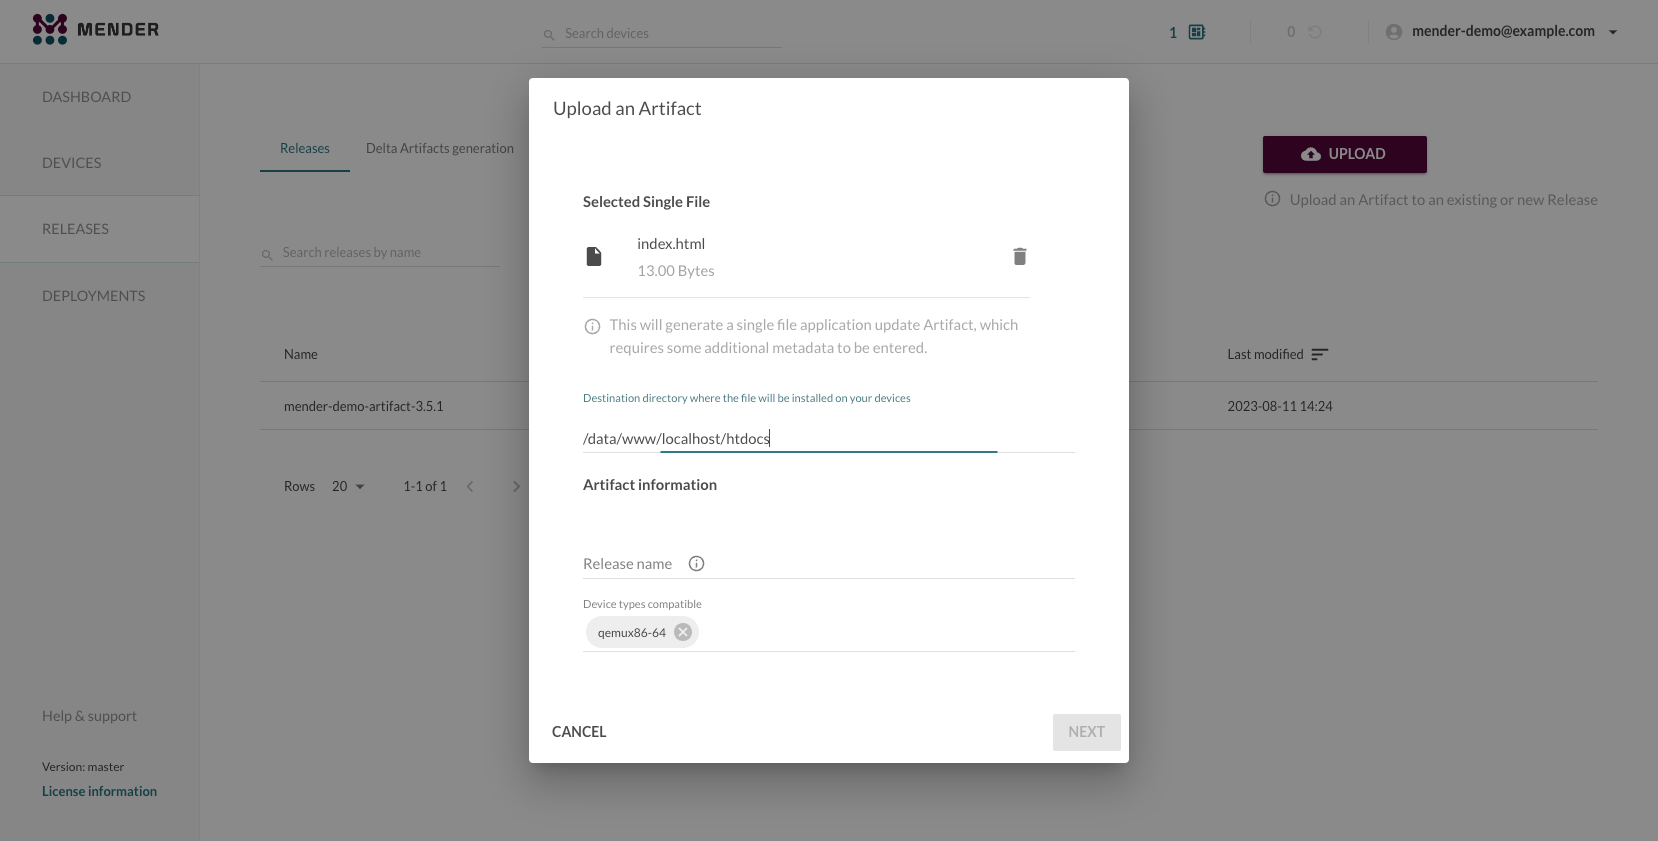
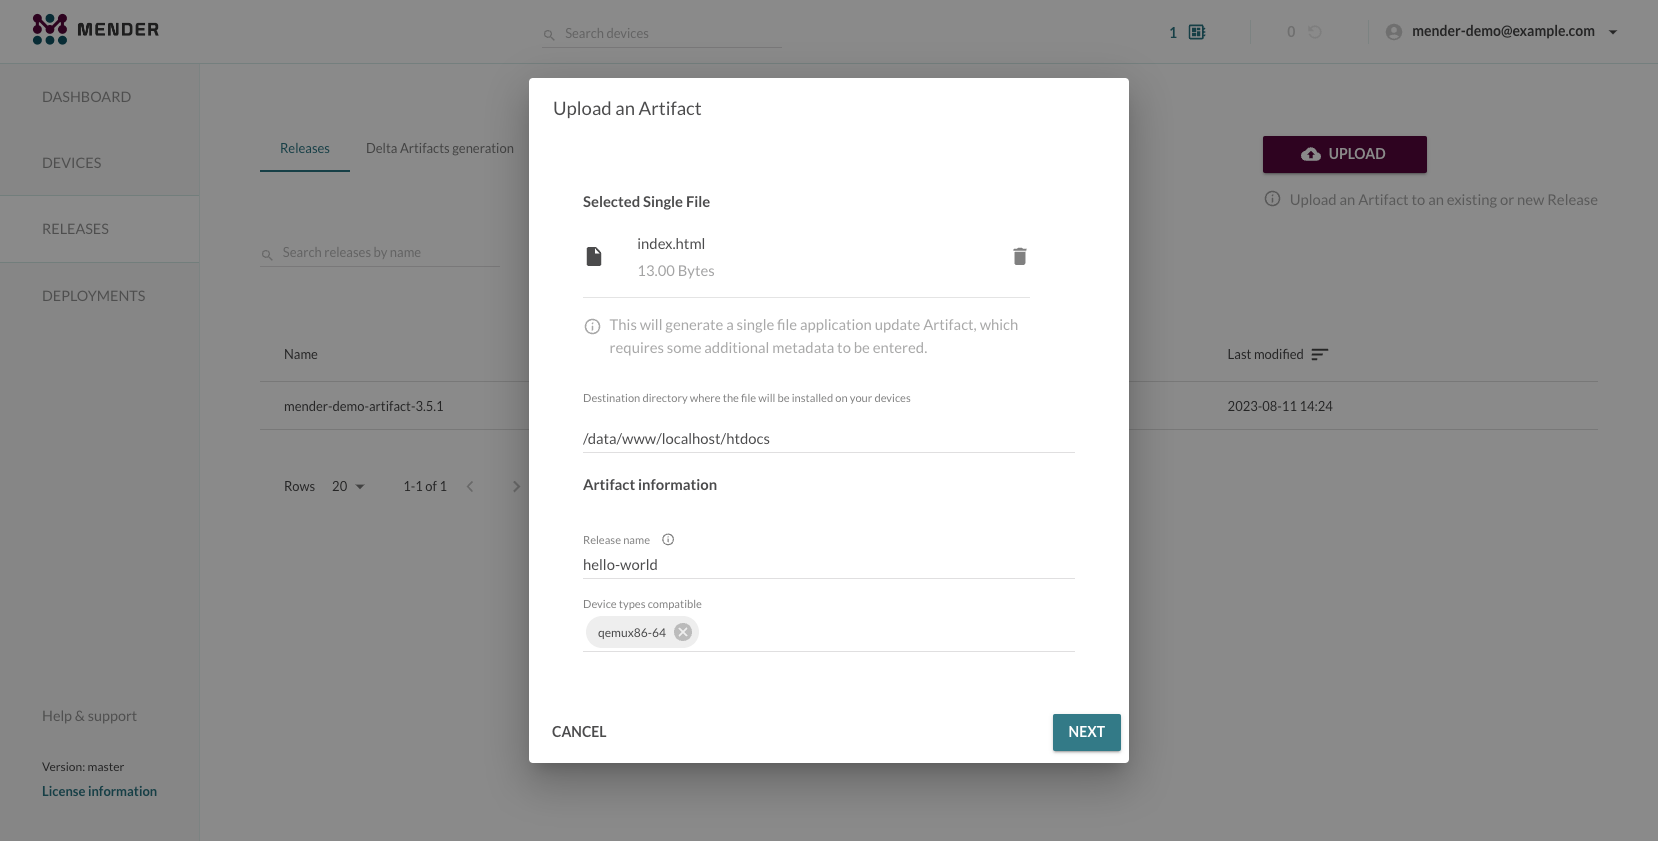
Drag-and-drop or click browse to select the index.html file you just created for upload.

When you upload a single file like this, you will get a wizard to
create a Mender Artifact
of the type file, which allows you deploy single files to your device.
Ensure the Destination directory field is filled as /data/www/localhost/htdocs as below, so the index.html gets file is placed in the correct destination on the device.
A Mender Artifact contains some mandatory fields:
-
Device types compatible - Types of devices, Components or Systems the software is compatible with, to ensure the software is not deployed to incompatible hardware (e.g. CPU architecture, hardware floating point support, peripheral drivers).
Depending on which device you are using you need to enter:
raspberrypi4orraspberrypi5if you are using a Raspberry Pigeneric-x86_64if you are using a virtual device
-
Release name - Name of the software build, so that software is not redeployed if it is already installed at the device.
- Input is a free form string, you can use e.g
hello-worldfor evaluation purposes
- Input is a free form string, you can use e.g
Fill out the required fields and click the NEXT button.
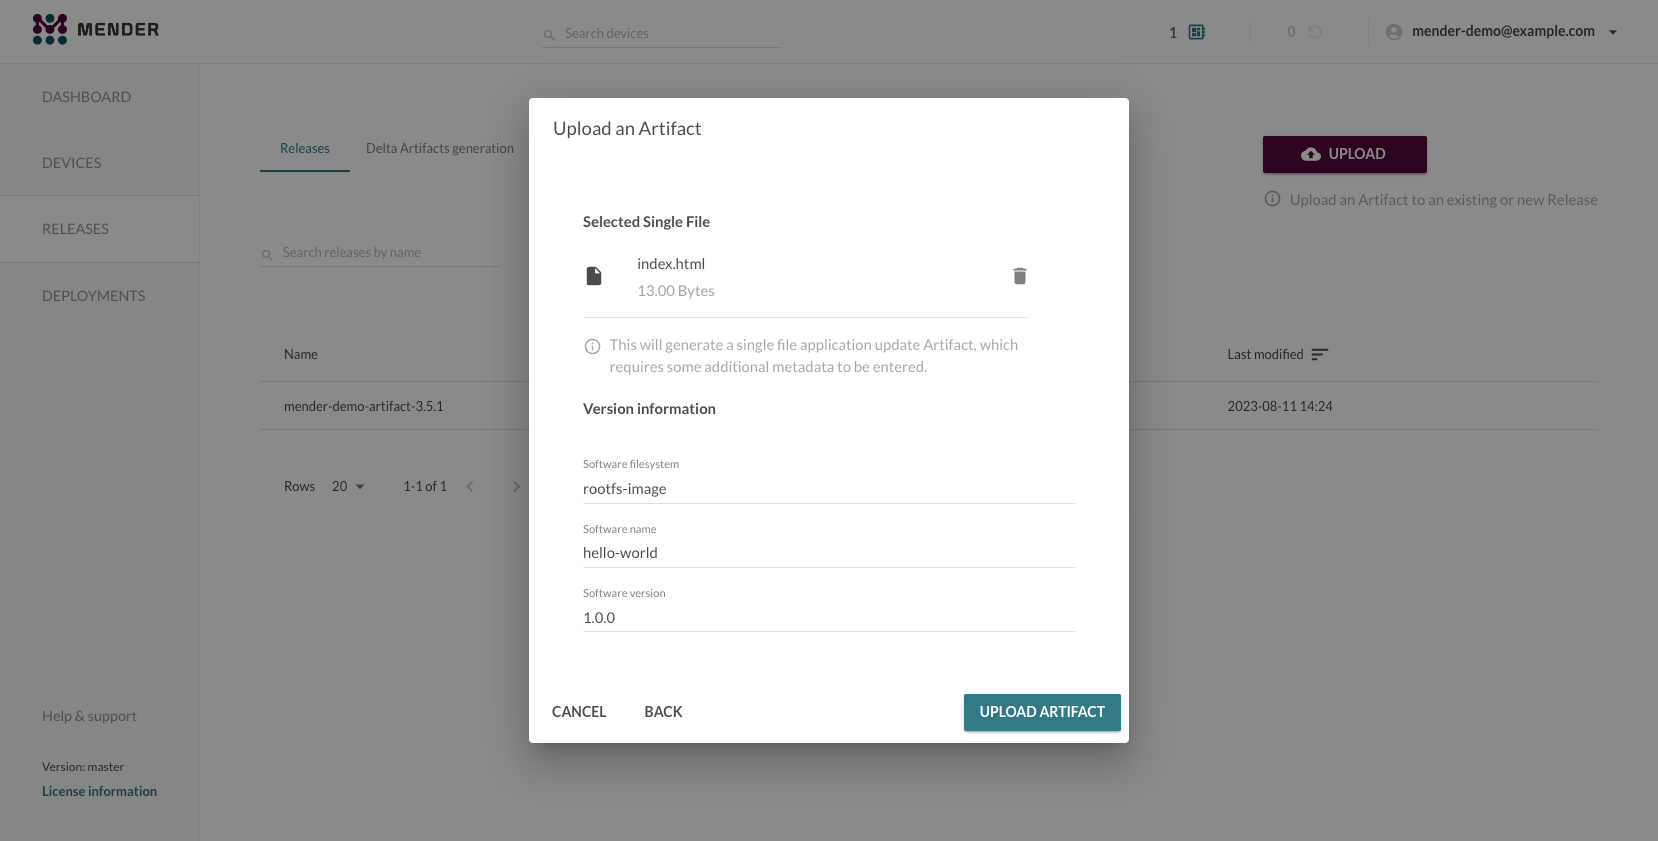
Leave the next prefilled fields as they are and click UPLOAD ARTIFACT as below.
You will now see a new Release containing this Artifact under the Releases tab. View its details, and create a deployment by clicking Create a deployment for this Release.
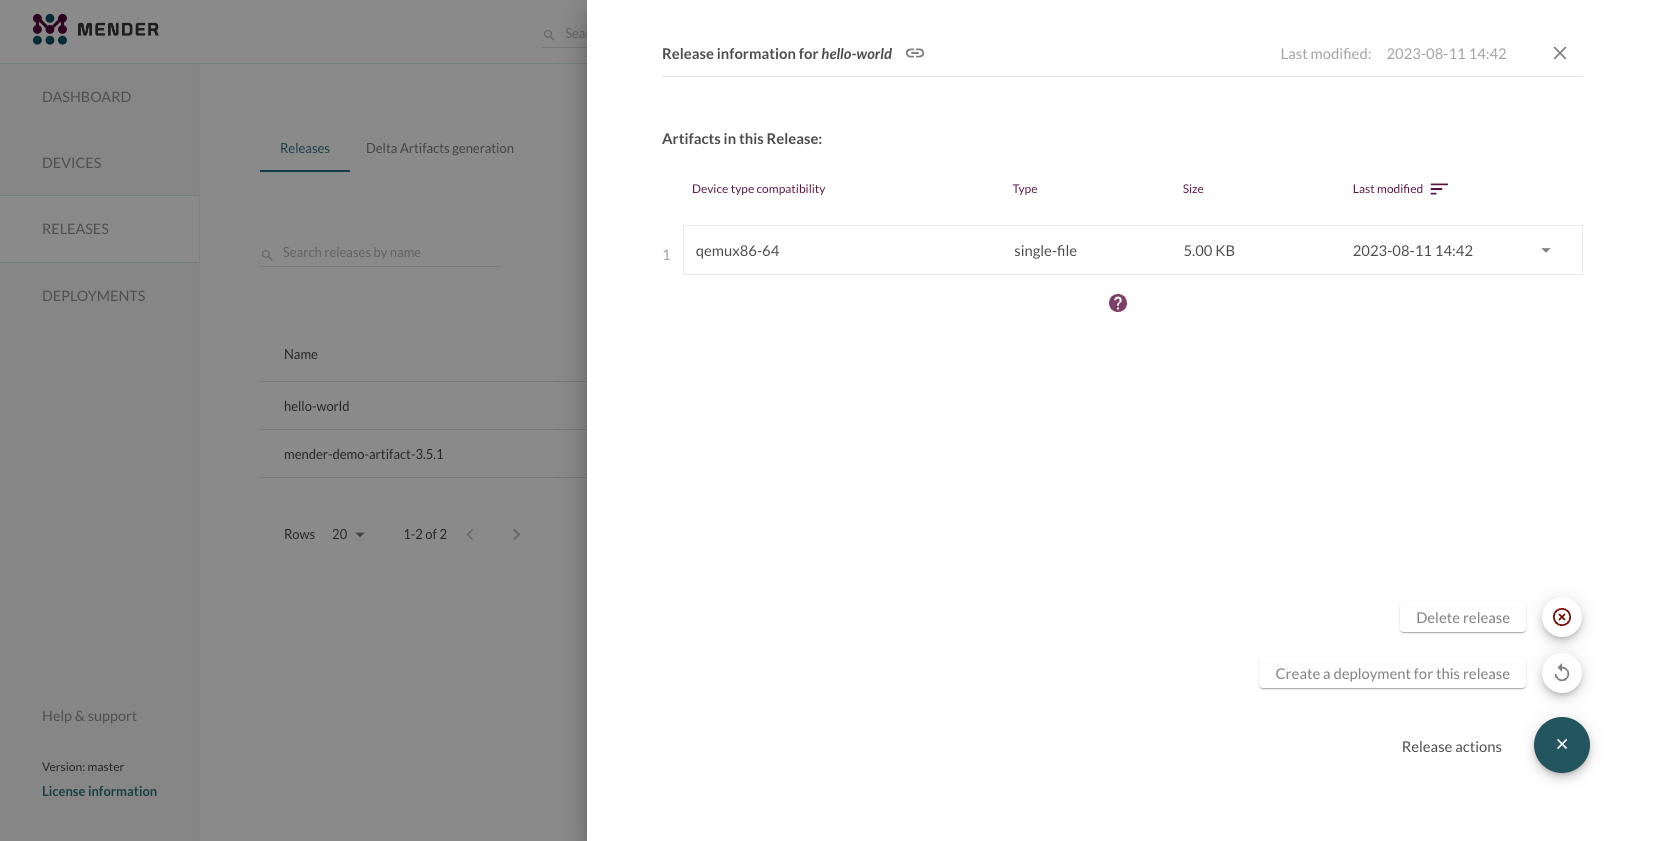
Click through the deployment wizard to make a new deployment, similarly to what you did in Step 1 - Create a Deployment; this time, use the hello-world Release.
Once the deployment finishes, refresh the demo web page from Step 1. If your deployment was successful, the `index.html file has updated on your device, and the page will now only show 'Hello World!'
Congratulations! You have successfully created and deployed a custom application update using Mender!
Next steps
Proceed to one of the next tutorial: